Find Me on Etsy!

Sunday, December 16, 2012

Shut the Front Door Sunday! Trying out a Pinterest Idea

I haven't been using my oven for the past few weeks. It'd had a thorough cleaning after the infamous glass pan explosion a few weeks back (I've yet to admit to this story on the blog, yet). Toaster oven, stove top, microwave, all have been put to good use...I was somehow afraid that I'd cause an explosion if I used the oven again. Some remaining glass would explode, or some cleanser residue I'd managed to leave behind catching fire (non-toxic but still flammable)....I finally braved the chance to use it when I unrolled a package of crescent rolls and had some processed food fun. Minus any explosions!

I confess, I love Pinterest...I think I spend more time searching for craft ideas on it than I do Google (poor, lonely Google). So many "pins" of ideas that I would have never thought of ...like how to make a meal out of a crescent roll or two.

I love crescent rolls, so I figured anything that I made with them had a chance to taste great. I had seen a few pinned recipes that I played around with and added my own flair to and viola...a quick, tasty dinner or lunch to take to work.


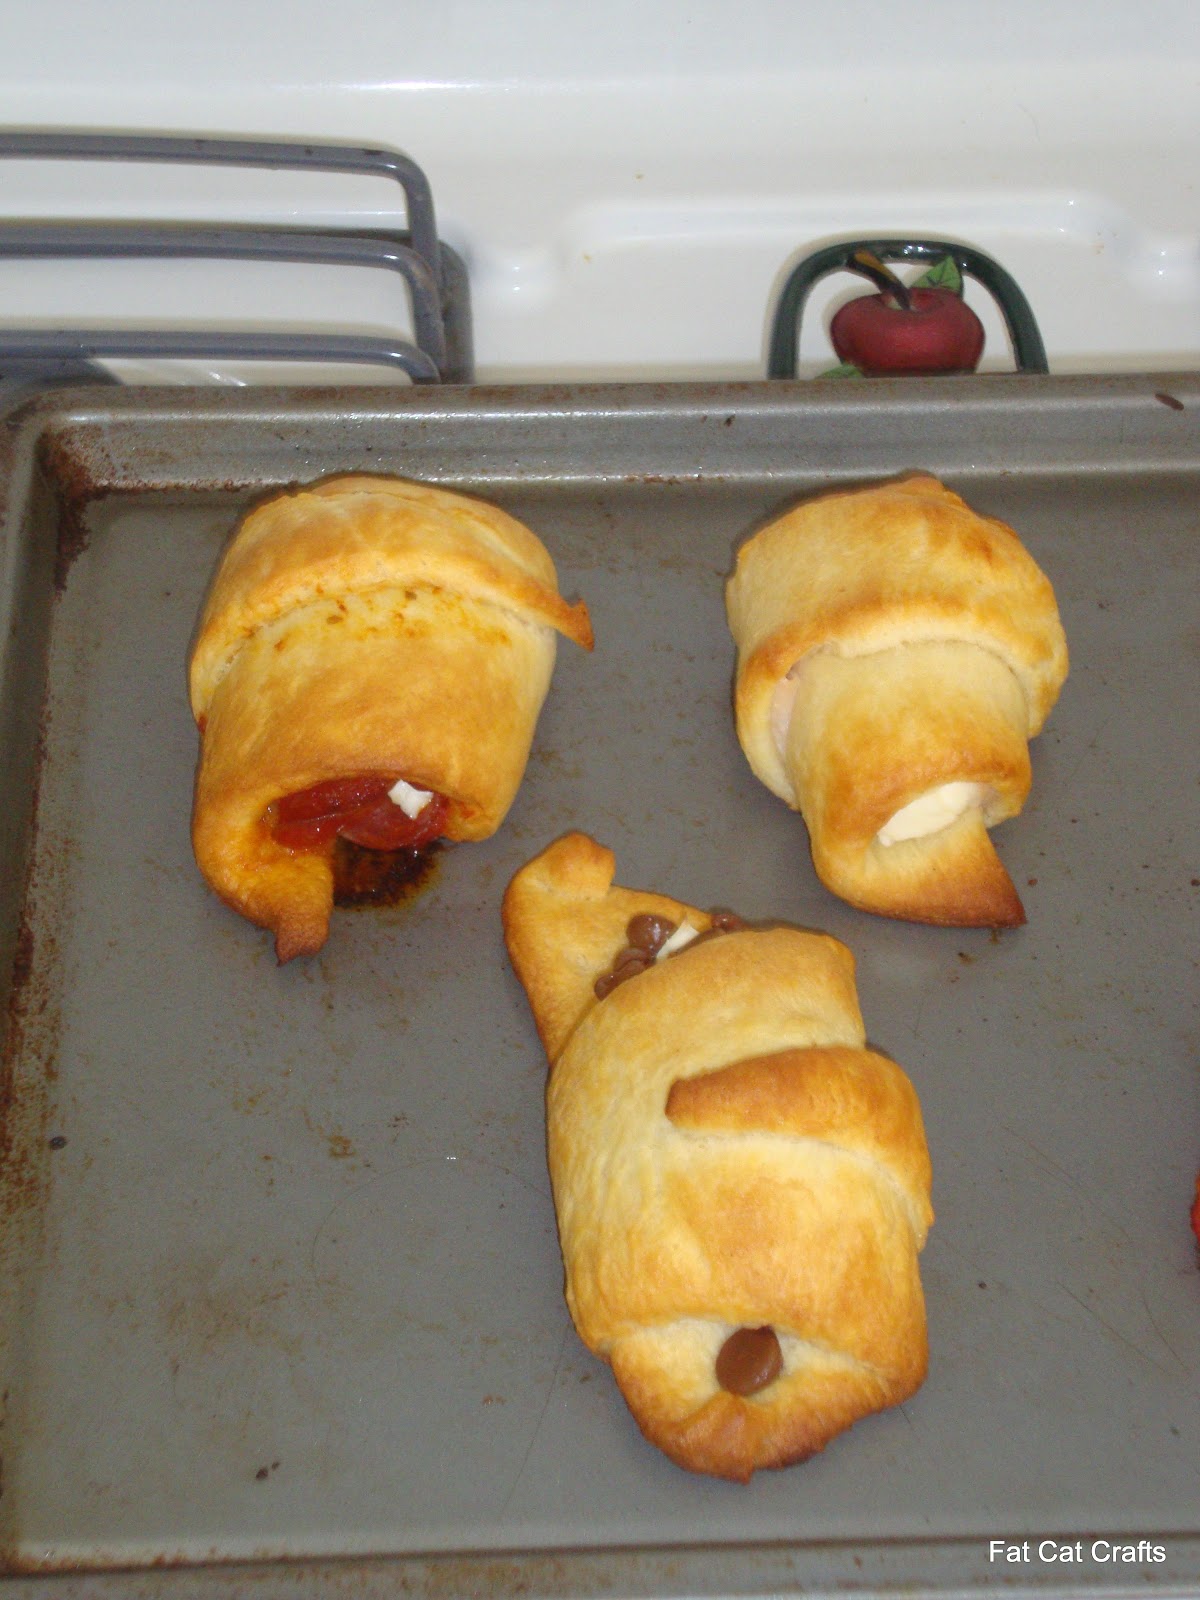
The ingredients I used are above...I decided to get the larger sized crescents but the smaller ones would work just fine (just use less filling). My favorite combo was the pizza roll up I made with a tablespoon of pizza sauce, half a stick of string cheese and some pepperoni.


The turkey/cream cheese with mustard roll up was tasty, as well.  I found that I actually preferred the lunch meat with the cream cheese instead of string cheese.


I also made a dessert roll up with some cream cheese and chocolate chips. Mmmm, yummy, if I do say so myself. Not particularly healthy but cheaper and probably slightly better for me than if I'd gotten some fast food. :0)

So, what fillings would you use in your crescent roll up?

Thursday, December 13, 2012

Here We Go Loopty Lou...

My sis was worried that little G needed a warmer hat with ear flaps to get through his first mountain winter. I knitted up the Loopy Pixie Hat from the book, Baby Beanies by Amanda Keeys using Vanna's Choice "Oatmeal" yarn. I didn't completely follow the pattern, opting to make and sew on the ear flaps after the hat was done.


Is he not too too cute?!

Wednesday, December 12, 2012

You Spin Me Right Round, Baby, Right Round

So many items that I've knitted or handmade lately have been for Christmas gifts so I can't post pics just yet BUT I have some items from earlier in the year that I was just too lazy to post. A favorite super easy but super darling "pinwheel" blanket pattern made it's way through the knitters in our family .

My mom did hers in a variegated yarn.


I used Simply Soft yarn by Carron and made a matching set of blankets for fraternal twins my girlfriend delivered earlier this summer.


My knitting niece, E, made a mini-version with just one skein of yarn for her baby brother.


Little G tested and approved!


The pattern comes from page 37 in  Knit-a-Long by Larissa and Martin Brown though I did see a pattern on Ravelry that gave a similar pattern and design instructions. You can use any size needles and any weight of yarn.

Tuesday, December 11, 2012

It's "Sew" FLUFFY!

I adore the movie Despicable Me. I love how Gru goes from this evil, hurting villain to a kind and doting father. I also love that it's about three sisters. The youngest, Agnes, cracks me up. I wonder why I can relate?! LOL My favorite scene is probably when Gru wins the big unicorn for Agnes at the amusement park. "It's so fluffy I'm gonna die!!!"


In all honesty, that is the expression is what I want to squeal when I make something uber-cute. Well, it may not be literally fluffy, but you get the point!

When I was growing up, the youngest of three little girls, we had good friends who lived just down the street and around the corner. So many of my childhood and school memories involve the Scott girls. We've kept in touch over the years, along with other girls that were in the girl scout troop my mom led for Karyn's class. While my sisters were having girls, the Scott girls were having boys. Then this past year, everything changed. Both of the Scott sisters had daughters and Karyn had a boy. No one saw that one coming!

One of the sisters had asked that if she had a girl, could I make a bonnet pattern I'd pinned on Pinterest. It was my joy to make matching bonnets for the girl cousins. My trusty sewing tutor was on hand to assist me. She and L had helped pick out the patterns/colors we used. They were feminine without being too cutesy. When we made them up, I almost shrilled with delight! So fluffy!!


Here's little Miss Rachel and her mama modeling one of the bonnets. I made her's a "3 to 6 month" size. I also made up some newborn sized bonnets on my own. So precious! Phat Cat was the unwilling model.


 And yes, even without the bonnet, he is quite "fluffy"...hee hee!

Monday, December 10, 2012

Life Sew Sweet

I absolutely couldn't wait to see my nieces and new nephew. So much was my anticipation that I took Thanksgiving week off of work and drove out to Arizona the Saturday before Thanksgiving. I told my sister not to tell E or A because I wanted to surprise them. And surprise them I did! What fun to see the shock on their faces. :0)

My oldest niece, E, loves crafts, just like so many other members of our family. She got her first sewing machine this year and has been eager to work on learning to make her own clothes.Though I've yet to sew more than a pillowcase dress, I know from experience how important it is to sew straight lines. So, I sent word that she should practice sewing on paper. It's what I did in Home Ec so many years ago. You don't use thread, you just sew along lines and get a feel for the process of sewing and the pressure needed to get a slow but steady speed going. And practice she did!

I absolutely couldn't wait to sew with her, though I knew we probably wouldn't get to any clothes sewing. I brought pieces for a simple bag (remember this?) that required straight lines. She did a fabulous job! The next day we were at Walmart and she spotted a pattern for another type of bag and I thought..why not give a try?! Truthfully, patterns still intimidate me! But I was up for the challenge and plus, the pattern was only .99 cents and fabric at Walmart is cheap. I found material for my bag for $1.50 a yard!


We studied the pattern, we pressed out wrinkles, we cut, we sewed...we made bags!


We had quite a "helper" during the whole process. Miss I couldn't resist seeing how she could contribute to the process. So interested and curious. We set very firm rules about what wasn't safe and then let her drag over her Elmo stool to watch and "help" us as only a two year old can. Sewing is thirsty work, so Miss I made sure we were well stocked for a tea party, too. (LOL)


We had plenty of other crafting that week (thread and yarn were in abundance!)...along with plenty of food and family time as we celebrated Thanksgiving together with my folks, other sister and other niece.

So much fun. So many handbags sewed! (Four completed plus we started a fifth!). Ahhh. So many memories made. Life can just be "sew" sweet when you share it with the ones you love. ;0)


Sunday, December 9, 2012

Homework

My extended family is a heavy proponent of education. They probably starting talking to me about college around the time I hit jr. high. When I transferred out of state to work on my Bachelors, they gave me practical and thoughtful going away gifts. My grandma made me extra pillow cases and assembled a mini-sewing kit. It was complete with an old fashioned tomato shaped pincushion with an attached little strawberry. I still have the kit, though I've used up or lost a few pieces over the year.

When I was taking my a-mazing sewing class earlier this year, the teacher gave us some simple homework assignments.  Sew, at least ten hours a week. Visit a fabric store, for at least one hour a week. (It sounds so hard, isn't it?!) And, make a large pincushion. I can't say how much I LOVED these homework assignments. ;0)

I wanted to have a little fun and I thought back to my classic red pin cushion.. I saw a darling kitty print at Joann's and knew just what I wanted to do. The cushion itself was pretty basic. Just rectangles and some polyester stuffing. For a touch of whimsy, I used a mouse pattern from Spud & Chloe's Visit to the Farm and knitted one up in brown. Then sewed.it onto the pincushion.


So cute, if I do say so myself! It makes me smile every time I see it. Can you blame me?

Saturday, December 8, 2012

Fat Cat Cooks...Hash Brown Scramble!

I've been on a cooking kick lately. 

I'm not a fan of cooking for just myself and getting tired of the same leftovers time and time again BUT it does save money to make your own meals. In the effort of making my own version of some of my regular meal out splurges, I've created a favorite "go to" meal-in-one-pan dish I refer to as Hash Brown Scramble. 
Originally I was trying to make a breakfast burrito but in all honesty, it doesn't need a tortilla. It's great just hot out of the pan. It's super easy and only takes a few ingredients.

A single serving consists of:
One small baked potato
Two strips of bacon (I use turkey bacon)
One egg
One tablespoon of milk
Shredded cheese 
Ketchup (optional)

Cut up the baked potato and the bacon into bite sized pieces. 
Fry in the pan, using the bacon grease to brown the potato.
When the bacon is close to being done, beat the egg and the milk and add mixture to pan.
When the egg is done cooking, turn off the heat and add cheese.
I add ketchup since I'm still not uber-crazy about the taste of egg. (::shrug::)


I'm hungry just looking at the picture. No really, it's dinner time and in all honesty, I think I'm going to go whip up a serving of Hash Brown Casserole! Yum!


Saturday, November 3, 2012

Fat Cat Cooks...Pancakes!

In less than two weeks, my parents will celebrate 43 years of marriage! When they said, "for better and for worse, 'til death do us part," they meant it! My mom says she could make cookies and jello when she got married...and that was it. Yet, over time, she learned and she learned well. "Oma" has several recipes my family considers essential to life. The wedding gift of a waffle machine is beloved...you can't get any better, even at a restaurant, than my mom's waffles. The recipe book that came with the machine is a family heirloom. The basic recipe can make either waffles or pancakes and they are just SO GOOD.

I've always been apathetic about making pancakes. Maybe even a little intimidated. I mean, you grow up with perfection and how do you compete? LOL However, a post on Facebook about pumpkin pie french toast got me in the mood for breakfast and also started getting me interested in more breakfast recipes...including pancakes. There are so many variations. When it comes to regular pancakes, I only want my mom's. But thanks to Pinterest and Google, I found a recipe for...wait for it...whole wheat carrot pancakes. Whole wheat flour. Cinnamon. Applesauce instead of using oil. Maple syrup in lieu of sugar. Shredded carrots (when I get married, I will have a carrot cake wedding cake...seriously! Love me some carrots). Healthy-ish AND yummy sounding.

::insert Hallelujah Chorus::


Hello, breakfast! I tweaked the recipe a bit by using shredded carrot, zucchinni AND apple.. I also added some pumpkin pie spice and a dash of vanilla. When it came time to inhale, I mean, eat them, I used real maple syrup instead of pancake syrup. Not the sweet-ish pancakes on the block, but in all...yummy. And filling!

My pancake flipping skills need some work, that is for sure. I made the full recipe so I could freeze leftovers for the work week. Yum ya yum yum yum. I might just go into a food coma now. ;0)


Saturday, September 15, 2012

Pillowcase Dresses

 
Mylinh and I decided to make pillowcase dresses for the two 2 year olds in our lives
(BabyGirl and "I").
 
My machine was still in the shop at the time but My graciously offered to let me use hers!
 
It was a bit strange to use a "newfangled" machine but it did the job nicely. My even gave me a tutorial on bias tape making...and she has a short cut way of doing it to save a bunch of time (having to sew all of those bias strips together--ugh!).
 
We used a pattern called "The Betsy Dress". Just google "Pillowcase Dress" and you'll find a number of patterns. You could even just use a nice pillowcase, and save some sewing time.  You can also just use pre-made/bought bias tape.
 
I chose DARLING and I and I mean cute cute cute elephant fabric. Sigh. With a teal/grey floral fabric to compliment it.


Alas, however, I'd forgotten about a genetic predisposition of elephant phobia (I's mama was afraid of a pink elephant birthday cake once upon a time!).
 
It took several weeks for I to act willingly wear the dress.
 
 
Totally cute, if I do say so myself!
 
Though I will say, her expression is rather revealing. Clearly, she tolerates elephants but does not love them. LOL
 
Check out her reaction to her new Elmo doll (crocheted with love by her Auntie Way Way):


Yep, that's Elmo love right there. The elephants, well, not so much.
 
What is an auntie to do???
 
Actually I went out and bought some Elmo fabric, determined to make a garment that she will like!
 
LOL
 
I've made several other pillowcase dresses since. They are really quite quick to whip up.
 
 
Here I stuck with the elephant theme, but went for store bought bias tape.


And here'a a cutie waiting to be sent out. The best thing about these dresses is that they can be worn over a shirt and leggings for cold weather. They can even be turned into shirts. They are very giving and flexible. "I" won't out grow hers for quite a while. Maybe she'll learn to like elephants a little more between now and then!
 
Until next time, happy crafting!

Wednesday, September 12, 2012

Phat Cat Summer

I was as lazy as Busy Bee this summer when it came to posting on this blog!
 
 
The heat hasn't helped...Busy is a big boy and this heat and humidity has really been getting to him.
 
Poor lovie ;0)
 
My mom asks me if I've thought about shaving him for the hot weather but I just can't do it. He's a vain cat and very handsome. He might develop a complex if I change his appearance that much.
 
Suzy isn't fond of how hot it's been getting, either,  but generally takes life in stride.
 
 
There's always room for squeezing in a cat nap in a tight corner. ;0)
 
Silly Susa!
 
I got my sewing machine back and conquered my first dress (with the help of my talented friend, Mylinh) and had some adventures with burlap and lace. I'm also working on more blankets/quilts for Christmas presents. I'm celebrating "National Sewing Month" in style and starting my first sewing class this Saturday. I can't wait to show you what I've been up to and keep you posted on my new class projects!

Sunday, July 29, 2012

The Cat's Meow

I've always loved cats. My first word was, according to my mom, "meow" and it was said in reference to a cat that I'd just seen. My first cat was a beautiful, though skittish and aloof, Calico named Oreo. Over the years, she by and far became "my" cat and I'm sure she's up in cat heaven, furious with jealousy that I've adopted Phat Cat and the Princess. She was quite possessive, lol.


I was 8 before my dad gave in and allowed us to get anything bigger than a goldfish or hamster (though he was quite fond of the finch, "Jay Jay" that we adoped from our neighbors when they moved). I loved all things cats as I begged and pleaded and waited for my dad to give in...and my extended family fed my love for cats any chance they got. (My dad never stood a chance!)


In circa 1980, my Grandma W. made my cousin and I matching cat blankets for Christmas. There are a number of embrodiered panels. I still have mine. :0)


Recently my sewing machine jammed up pretty good. It's a hand-me-down that I inherited from my aunt when she passed, and it actually belonged first to my Grandma W. She has upgraded her machine a few times since 1980 and mom found an even older machine of my Grandma's in storage and I gave it a try since the repair price was going to take a bite out of my budget. The tension was off which led to funky seams and I eventually had to give in and decide to repair the one I've been learning on. But the cool part was that the older sewing machine was the one that my grandma used to make the cat quilts. I loved sewing on it, knowing how much time and love she has poured into her crafting over the years.

Eventually my plan is to get the older one repaired along with my mom's old Singer so that E and G can have machines to fulfill their dreams of learning to sew modest clothing for themselves. :0) But in the meantime, I'm counting down the days until I can get back to my sewing projects and doing some knitting. More on my knitting projects to come!

Baby, It's...well...not cold...not yet!

In the middle of a beautiful SoCal summer and what am I doing? Making blankets! In my defense, I'm making Christmas gifts...pretty darn early. It might  be a record! The idea started with a piece of floral fleece that I saw in the remnent bin at Joann's Fabrics.


I kept ignoring it but after a few trips, I finally couldn't resist it. I saw that it was over a yard in size, making it perfect for a no-sew tied ends blanket for my toddler-aged niece, I. I hadn't made one before, but I found a great tutorial online at CustomScrapbookMaker.

She gave several good tips. One was to cut out a square shape from all four corners of the blanket before cutting the fringes. I also picked up the idea to tie every other set of ties, flip the blanket over and do the rest.

I picked a contrasting pattern for the backside that was on sale. Oh, and the BEST part of deal? Joann's remnants are automatically 50% off...BUT if the orignal price goes on sale, the remnant ends up being half of the SALE price. I made this blanket for just around $10!


I've picked up several pieces of fleece in the remnant bin and matched them with solid fleece pieces which have been on sale for 40% for the past several weeks. Each blanket (some 1.5 yards) will end up costing between $10-$14 each. Not bad for a baby shower or birthday gift idea.

I plan to make rag quilts for G & A and have got some terrific prints to work with...but for baby G's blanket, I've cheated just a bit.


Joann's sells this amazing fabric that is already quilted for you...out of darling prints and minky fabric. I found this jungle piece...in the remnant bin, of course! I picked up the minky with a 40% coupon. Since Arizona mountain winters get cold, I layed a thin piece of batting between the minky and the front fabric. Boy, is that quilt going to be warm! I sewed it with the right sides facing in, left a small gap and turned it right side out. Then sewed another seam all the way around. The only particularly fancy method I used in making the quilt was to round the corners (using a salad plate as a template). And viola! Two Christmas gifts already done and it's only July! Woohoo :0)

Tuesday, July 17, 2012

Pink with Happiness

A dear friend of mine from high school is getting married this summer!


I hadn't seen her for ages but if I know one thing about her it's that she adores the color pink! (She also loves hearts.)


The lovely ladies at her church hosted a bridal shower for her and rather than going the traditional registery route, I decided to make an apron and some other kitchen goodies.


The bride love it! In fact, she wore it for the rest of the shower. :0)

I also attempted potholders using a product called Insul-Brite inside to help the potholder retain the heat of the pan without transfering it to the hand of the bride.
Let me tell you, it was a LOT of layers to sew with some batting put in for good measure and a pocket in front for a better grip! I tried my hand at quilting for the first time and I actually was pleased with those results.


The biggest challenge was sewing through all of those layers and having the sewing lines come out nice and straight on BOTH sides. In short, the backside of it looked awful the first time I tried it. It was actually even harder on the second potholder for some reason. In fact, originally the bride was going to end up with three potholders but she got two because by the third I was done picking out all of the seams over and over!  s

It was also my first use of bias tape. Both the potholders and the bias tape tutorials I used came from Prudent Baby.


For fun I also embellished some plain white utility dishtowels in a similar manner as I did the embellished burb clothes. Just cut, folded edges and sewed. Whenever I do this again, I'll add lace or ribbon to pretty it up. :0)

Saturday, July 14, 2012

Tick Tock Tick Tock, Baby Mama's Ready to Pop!


The craft desk looks ready to explode, doesn't it!? La Princessa doesn't want any of it to end...so much stuff to get into!


I did a good job of spacing out the crafty over on the weekends over the month prior to the shower. I even wrapped up some blankets and onsies to look like cupcakes just for the fun of it.


My wonderfully sweet co-hostess took care of buying favors, game gifts and all of the tableware/napkins/plates/etc. The only thing I couldn't decide on until last minute were the games. The internet provided some great ideas, I just was waiting to find out the total head count and also get a feel for the atmosphere the shower would have. You are never quite sure of how something will go over until you are in the moment.

The day of the shower dawned and it was a delight. Baby Mama MADE the cupcakes for her own shower (and provided both the locale and the food).


Here's some pics of Mama and I with her furry babies (omgosh cuteness!) ...


...and a shot of her with the cohostess, her amazing sister-in-law.


The shower was a success, the games were fun and entertaining and Mama got lots of lovely gifts (here's one with the blanket I knitted for my honorary nephew).


It's always a nice feeling when an event is done just because there is that sense of completion but it was such a joy to plan and put on, the only thing I was glad for after was to put my feet up for a bit. Well...put them up AFTER I  had a little fun at the nearby Joann's, of course.

A girl's gotta do what a girl's gotta do, right?! ;0)

Baby Minons!

""Help from Phat Cat not required""

Thanks to PharMa.com I found the cutest baby shower decoration I've seen in a long time.
Hello, diaper babies!


                                        They look like baby Minions (a la Despicable Me), don't they?


I found myself inspired to make them around 8:30 on a Friday night. The only thing I didn't have was the little googley eyes. I figured they might have them at Walmart but what I realized what I really wanted was a 24 hour craft store. Wouldn't that be the BOMB?!

Anyway, I decided to make them up to the last step and waited until morning to go to Michael's to get  the eyes.

All you need are newborn diapers that you roll up and secure with a straight pin or tape. Wrap and tuck a baby washcloth around the bottom to look like a daper (I added a safety pin for aesthetics). Roll up a baby sock and put it on top like a hat. And glue on some googley eyes with a hot glue gun.

The baby mama can even use all of the pieces (sans the googley eyes)...if she can bear to deconstruct such cuteness, that is. ;0)


Friday, July 13, 2012

Diaper Wreath

 Oh, crafting with two nosey cats always adds a little fun (and some cat hair!) to the project. A late night venture onto Pinterest Friday night inspired my diaper wreath project.

Thanks to Petite Lemon, I found a great way to turn ordinary diaper clothes into gorgeous burp clothes that made for a terrific diaper wreath. I cut strips of cloth, folded over the edges and sewed them onto the diaper. Yup, that easy!

It took a little figuring as to how I was going to get them to stay hanging on the wire wreath I had but I used cheap ribbon from Michael's (3/$1 sale). I also added some onsies that I ironed stars onto for extra pizzaz! I left it to hang on my closet door for a few hours just to make sure it would at least last through the shower!


Saturday, May 26, 2012

Baby Shower Prep--Americana Style!

 I have known Mel since 9th grade drama class and I'm thrilled to co-host a baby shower for her along with her sister-in-law, Tracy. I have been wanting to make a pennant banner since seeing them shown off on Pinterest  and I never mind an excuse to try a new pattern...well, as long as it involves sewing straight lines! LOL Mel is decorating the nursery in "Americana" colors and after making a few rounds over the past few weeks checking out fabric options at Joann's, I finally committed. I bought extra of each, hoping to use it in other baby shower decorations, as well.

I used the tutorial over at Sugar Bee for how to make a simple but beautiful pennant banner. A key tip I learned was to use  fusible interfacing on the pennants. I went for the thickest I could find. I also liked her suggestion of sewing the pennants to double fold bias tape. Genius!
The project did not take long and here's a sneak peak of the banner. I had planned to add the letters of the baby's name to the banner but now I'm debating if I will or not. I have a few weeks before the shower to decide.

I found some other terrific ideas on Pinterst for baby shower decorations that I will be working on this weekend, as well as attending the wedding for one of my dearest friends. What are you up to this Memorial Day weekend, fellow crafters?