Find Me on Etsy!

Sunday, July 29, 2012

The Cat's Meow

I've always loved cats. My first word was, according to my mom, "meow" and it was said in reference to a cat that I'd just seen. My first cat was a beautiful, though skittish and aloof, Calico named Oreo. Over the years, she by and far became "my" cat and I'm sure she's up in cat heaven, furious with jealousy that I've adopted Phat Cat and the Princess. She was quite possessive, lol.


I was 8 before my dad gave in and allowed us to get anything bigger than a goldfish or hamster (though he was quite fond of the finch, "Jay Jay" that we adoped from our neighbors when they moved). I loved all things cats as I begged and pleaded and waited for my dad to give in...and my extended family fed my love for cats any chance they got. (My dad never stood a chance!)


In circa 1980, my Grandma W. made my cousin and I matching cat blankets for Christmas. There are a number of embrodiered panels. I still have mine. :0)


Recently my sewing machine jammed up pretty good. It's a hand-me-down that I inherited from my aunt when she passed, and it actually belonged first to my Grandma W. She has upgraded her machine a few times since 1980 and mom found an even older machine of my Grandma's in storage and I gave it a try since the repair price was going to take a bite out of my budget. The tension was off which led to funky seams and I eventually had to give in and decide to repair the one I've been learning on. But the cool part was that the older sewing machine was the one that my grandma used to make the cat quilts. I loved sewing on it, knowing how much time and love she has poured into her crafting over the years.

Eventually my plan is to get the older one repaired along with my mom's old Singer so that E and G can have machines to fulfill their dreams of learning to sew modest clothing for themselves. :0) But in the meantime, I'm counting down the days until I can get back to my sewing projects and doing some knitting. More on my knitting projects to come!

Baby, It's...well...not cold...not yet!

In the middle of a beautiful SoCal summer and what am I doing? Making blankets! In my defense, I'm making Christmas gifts...pretty darn early. It might  be a record! The idea started with a piece of floral fleece that I saw in the remnent bin at Joann's Fabrics.


I kept ignoring it but after a few trips, I finally couldn't resist it. I saw that it was over a yard in size, making it perfect for a no-sew tied ends blanket for my toddler-aged niece, I. I hadn't made one before, but I found a great tutorial online at CustomScrapbookMaker.

She gave several good tips. One was to cut out a square shape from all four corners of the blanket before cutting the fringes. I also picked up the idea to tie every other set of ties, flip the blanket over and do the rest.

I picked a contrasting pattern for the backside that was on sale. Oh, and the BEST part of deal? Joann's remnants are automatically 50% off...BUT if the orignal price goes on sale, the remnant ends up being half of the SALE price. I made this blanket for just around $10!


I've picked up several pieces of fleece in the remnant bin and matched them with solid fleece pieces which have been on sale for 40% for the past several weeks. Each blanket (some 1.5 yards) will end up costing between $10-$14 each. Not bad for a baby shower or birthday gift idea.

I plan to make rag quilts for G & A and have got some terrific prints to work with...but for baby G's blanket, I've cheated just a bit.


Joann's sells this amazing fabric that is already quilted for you...out of darling prints and minky fabric. I found this jungle piece...in the remnant bin, of course! I picked up the minky with a 40% coupon. Since Arizona mountain winters get cold, I layed a thin piece of batting between the minky and the front fabric. Boy, is that quilt going to be warm! I sewed it with the right sides facing in, left a small gap and turned it right side out. Then sewed another seam all the way around. The only particularly fancy method I used in making the quilt was to round the corners (using a salad plate as a template). And viola! Two Christmas gifts already done and it's only July! Woohoo :0)

Tuesday, July 17, 2012

Pink with Happiness

A dear friend of mine from high school is getting married this summer!


I hadn't seen her for ages but if I know one thing about her it's that she adores the color pink! (She also loves hearts.)


The lovely ladies at her church hosted a bridal shower for her and rather than going the traditional registery route, I decided to make an apron and some other kitchen goodies.


The bride love it! In fact, she wore it for the rest of the shower. :0)

I also attempted potholders using a product called Insul-Brite inside to help the potholder retain the heat of the pan without transfering it to the hand of the bride.
Let me tell you, it was a LOT of layers to sew with some batting put in for good measure and a pocket in front for a better grip! I tried my hand at quilting for the first time and I actually was pleased with those results.


The biggest challenge was sewing through all of those layers and having the sewing lines come out nice and straight on BOTH sides. In short, the backside of it looked awful the first time I tried it. It was actually even harder on the second potholder for some reason. In fact, originally the bride was going to end up with three potholders but she got two because by the third I was done picking out all of the seams over and over!  s

It was also my first use of bias tape. Both the potholders and the bias tape tutorials I used came from Prudent Baby.


For fun I also embellished some plain white utility dishtowels in a similar manner as I did the embellished burb clothes. Just cut, folded edges and sewed. Whenever I do this again, I'll add lace or ribbon to pretty it up. :0)

Saturday, July 14, 2012

Tick Tock Tick Tock, Baby Mama's Ready to Pop!


The craft desk looks ready to explode, doesn't it!? La Princessa doesn't want any of it to end...so much stuff to get into!


I did a good job of spacing out the crafty over on the weekends over the month prior to the shower. I even wrapped up some blankets and onsies to look like cupcakes just for the fun of it.


My wonderfully sweet co-hostess took care of buying favors, game gifts and all of the tableware/napkins/plates/etc. The only thing I couldn't decide on until last minute were the games. The internet provided some great ideas, I just was waiting to find out the total head count and also get a feel for the atmosphere the shower would have. You are never quite sure of how something will go over until you are in the moment.

The day of the shower dawned and it was a delight. Baby Mama MADE the cupcakes for her own shower (and provided both the locale and the food).


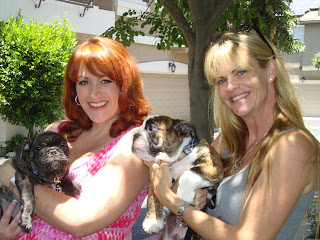
Here's some pics of Mama and I with her furry babies (omgosh cuteness!) ...


...and a shot of her with the cohostess, her amazing sister-in-law.


The shower was a success, the games were fun and entertaining and Mama got lots of lovely gifts (here's one with the blanket I knitted for my honorary nephew).


It's always a nice feeling when an event is done just because there is that sense of completion but it was such a joy to plan and put on, the only thing I was glad for after was to put my feet up for a bit. Well...put them up AFTER I  had a little fun at the nearby Joann's, of course.

A girl's gotta do what a girl's gotta do, right?! ;0)

Baby Minons!

""Help from Phat Cat not required""

Thanks to PharMa.com I found the cutest baby shower decoration I've seen in a long time.
Hello, diaper babies!


                                        They look like baby Minions (a la Despicable Me), don't they?


I found myself inspired to make them around 8:30 on a Friday night. The only thing I didn't have was the little googley eyes. I figured they might have them at Walmart but what I realized what I really wanted was a 24 hour craft store. Wouldn't that be the BOMB?!

Anyway, I decided to make them up to the last step and waited until morning to go to Michael's to get  the eyes.

All you need are newborn diapers that you roll up and secure with a straight pin or tape. Wrap and tuck a baby washcloth around the bottom to look like a daper (I added a safety pin for aesthetics). Roll up a baby sock and put it on top like a hat. And glue on some googley eyes with a hot glue gun.

The baby mama can even use all of the pieces (sans the googley eyes)...if she can bear to deconstruct such cuteness, that is. ;0)


Friday, July 13, 2012

Diaper Wreath

 Oh, crafting with two nosey cats always adds a little fun (and some cat hair!) to the project. A late night venture onto Pinterest Friday night inspired my diaper wreath project.

Thanks to Petite Lemon, I found a great way to turn ordinary diaper clothes into gorgeous burp clothes that made for a terrific diaper wreath. I cut strips of cloth, folded over the edges and sewed them onto the diaper. Yup, that easy!

It took a little figuring as to how I was going to get them to stay hanging on the wire wreath I had but I used cheap ribbon from Michael's (3/$1 sale). I also added some onsies that I ironed stars onto for extra pizzaz! I left it to hang on my closet door for a few hours just to make sure it would at least last through the shower!